
All University-owned computers enrolled in Secure Computing have access to an on-demand software catalog on both PC and Mac platforms. The software available through the catalog can be installed with a couple of clicks and doesn’t require that a request be made to a DDS technician or department IT professional.
Unsure if your device is enrolled in Secure Computing? Follow the instructions below to find the self service software application on your device. If you don't find the application and want to learn more about enrolling in Secure Computing, contact the IT service center at 303-735-4357 or oithelp@colorado.edu.
Find the self service software application
For Windows devices, the self service software application is called Software Center. On Macs, the application is called Self Service. Click to expand the dropdowns below for instructions and screenshots showing how to find your device's application.
Windows Software Center Instructions
Secure Computing Windows users have access to the software catalog through Software Center. The easiest way to access software center is to press the windows key and type Software Center. 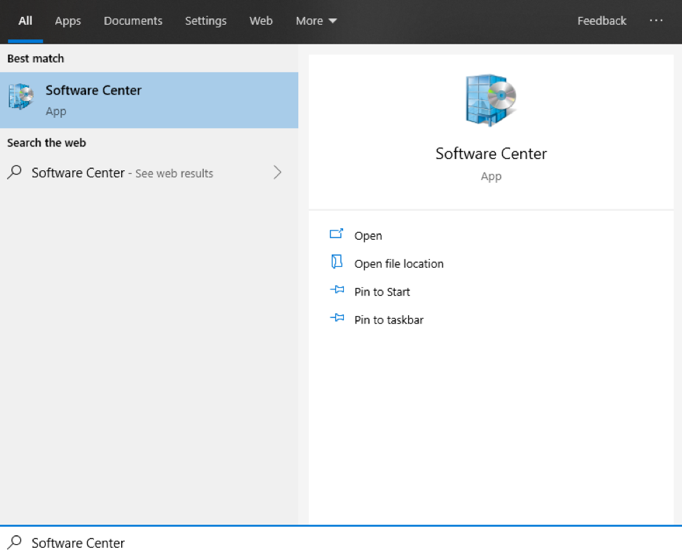
Self Service will open and default to a list of applications available for install. Click on any software icon to see more information and install. 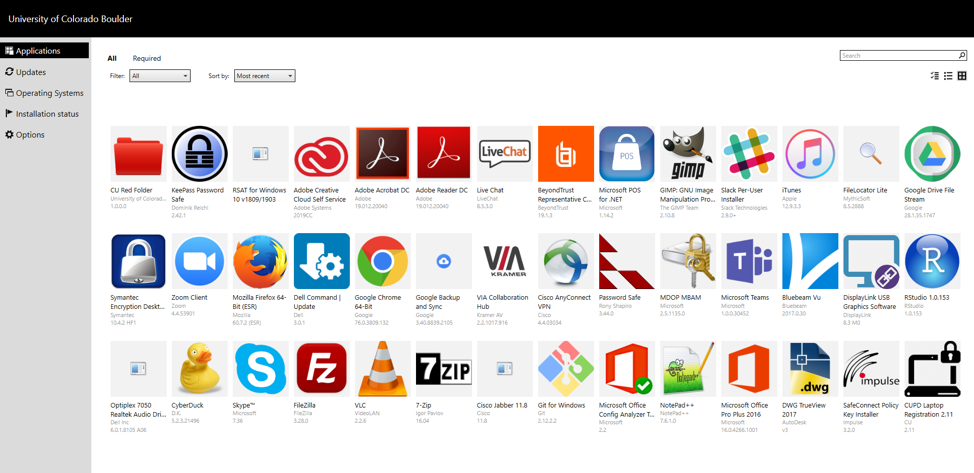
Click install and the software will begin installing. 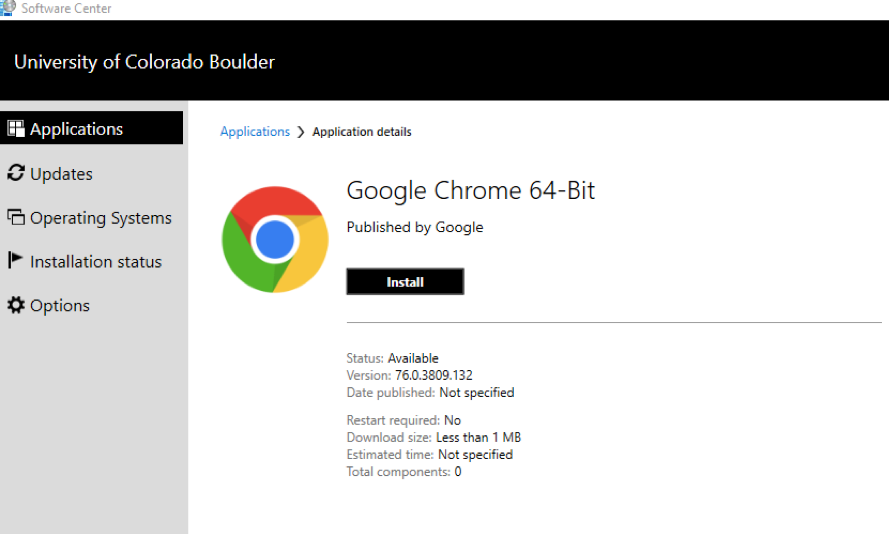
You can also view available updates to software and the operating system through Software Center’s Updates tab. Updates will automatically install without user intervention on DDS systems in most cases, you can also install available updates early from this tab. Each update can be selected and installed manually. Please note: Some updates will also require a reboot after installation.
Mac Self Service Instructions
Mac users can access the software catalog through Self Service which can be opened several ways:
Open a Finder window and navigate to the Applications folder. Scroll down to find Self Service with the CU Buffalo icon.

The Self Service app will be placed by default on the dock of all Secure Compute devices.

Searching for Self Service in Spotlight will reveal the app and allow you to open it.

Click on the CU logo in the top right corner of the screen and select Self Service.

Once opened, Self Service will show a list of applications available for installation.

To Install, click the application’s tile which will give you a short description and the option to install. Click Install to begin installing the application.

Some applications are restricted to specific users. Click the Log In button in the top right corner of Self Service and log in with your IdentiKey credentials. Once logged in any applications that can only be installed if you are in the correct user groups will appear and be available for install.

Please note: Software that does not appear in the list after signing in may still be restricted due to licensing but may still be requested from your departmental IT professional, DDS technician, or the IT Service Center. Major software updates, such as upgrading to a new operating system, can be done through the Self Service portal and will appear in the list of available software. Regular security updates are not available in Self Service and instead will install automatically. Updates to Macs regularly require reboots.